
Welcome back to our series on pearl polor treatments. We’ve covered the following topics in our other blogs.
What Colors Are Pearls? Natural Pearl Colors Explained
Pearl Color Treatments: 5 Ways Pearl Colors Are Enhanced
Dyed Pearls: How to Tell If Pearls Are Dyed?
Irradiated Pearls vs Natural Grey Pearls: How to Tell the Difference
Pearl Toning Explained: The Secret Behind Pink Akoya Pearls
Do Pearls Change Color Over Time? Natural Pearl Fading Explained
Today, we dive into a specific surface treatment: coated pearls, and the combination of dyeing + coating.
Part 1: Coated Pearls (Surface Coating)
When we talk about coated pearls, we are referring to a process applied on top of a real pearl— either natural or cultured. We are not discussing imitation pearls here. Coating is a method used to enhance luster or alter color by applying a thin layer of material (such as metal oxides, lacquer, or synthetic polymers) to the pearl’s surface.
It is important to note that a simple coating cannot change the base color of the pearl nucleus. Therefore, treaters usually select pearls that already match the target color family. This ensures the final color appears vibrant without looking mismatched or uneven.
If the base material is a genuine pearl, a coated pearl is still technically a real pearl. However, this pearl treatment must be clearly disclosed. The coating sits on the surface; it is not part of the natural nacre. Consequently, this layer is generally more fragile than the nacre structure beneath it.
In short, the coating is a temporary enhancement. Daily wear can cause it to flake off. If you own coated pearls, handle them with extreme care. Avoid chemicals, perfumes, and abrasive materials.
How to Identify Coated Pearls
Experienced buyers often spot coatings through the quality of the luster. At first glance, a coated pearl may look “oily” or hyper-glossy. However, this shine often looks like a glassy film sitting on the surface, lacking the deep, layered glow that comes “from within” a natural pearl. See the picture below as an example.
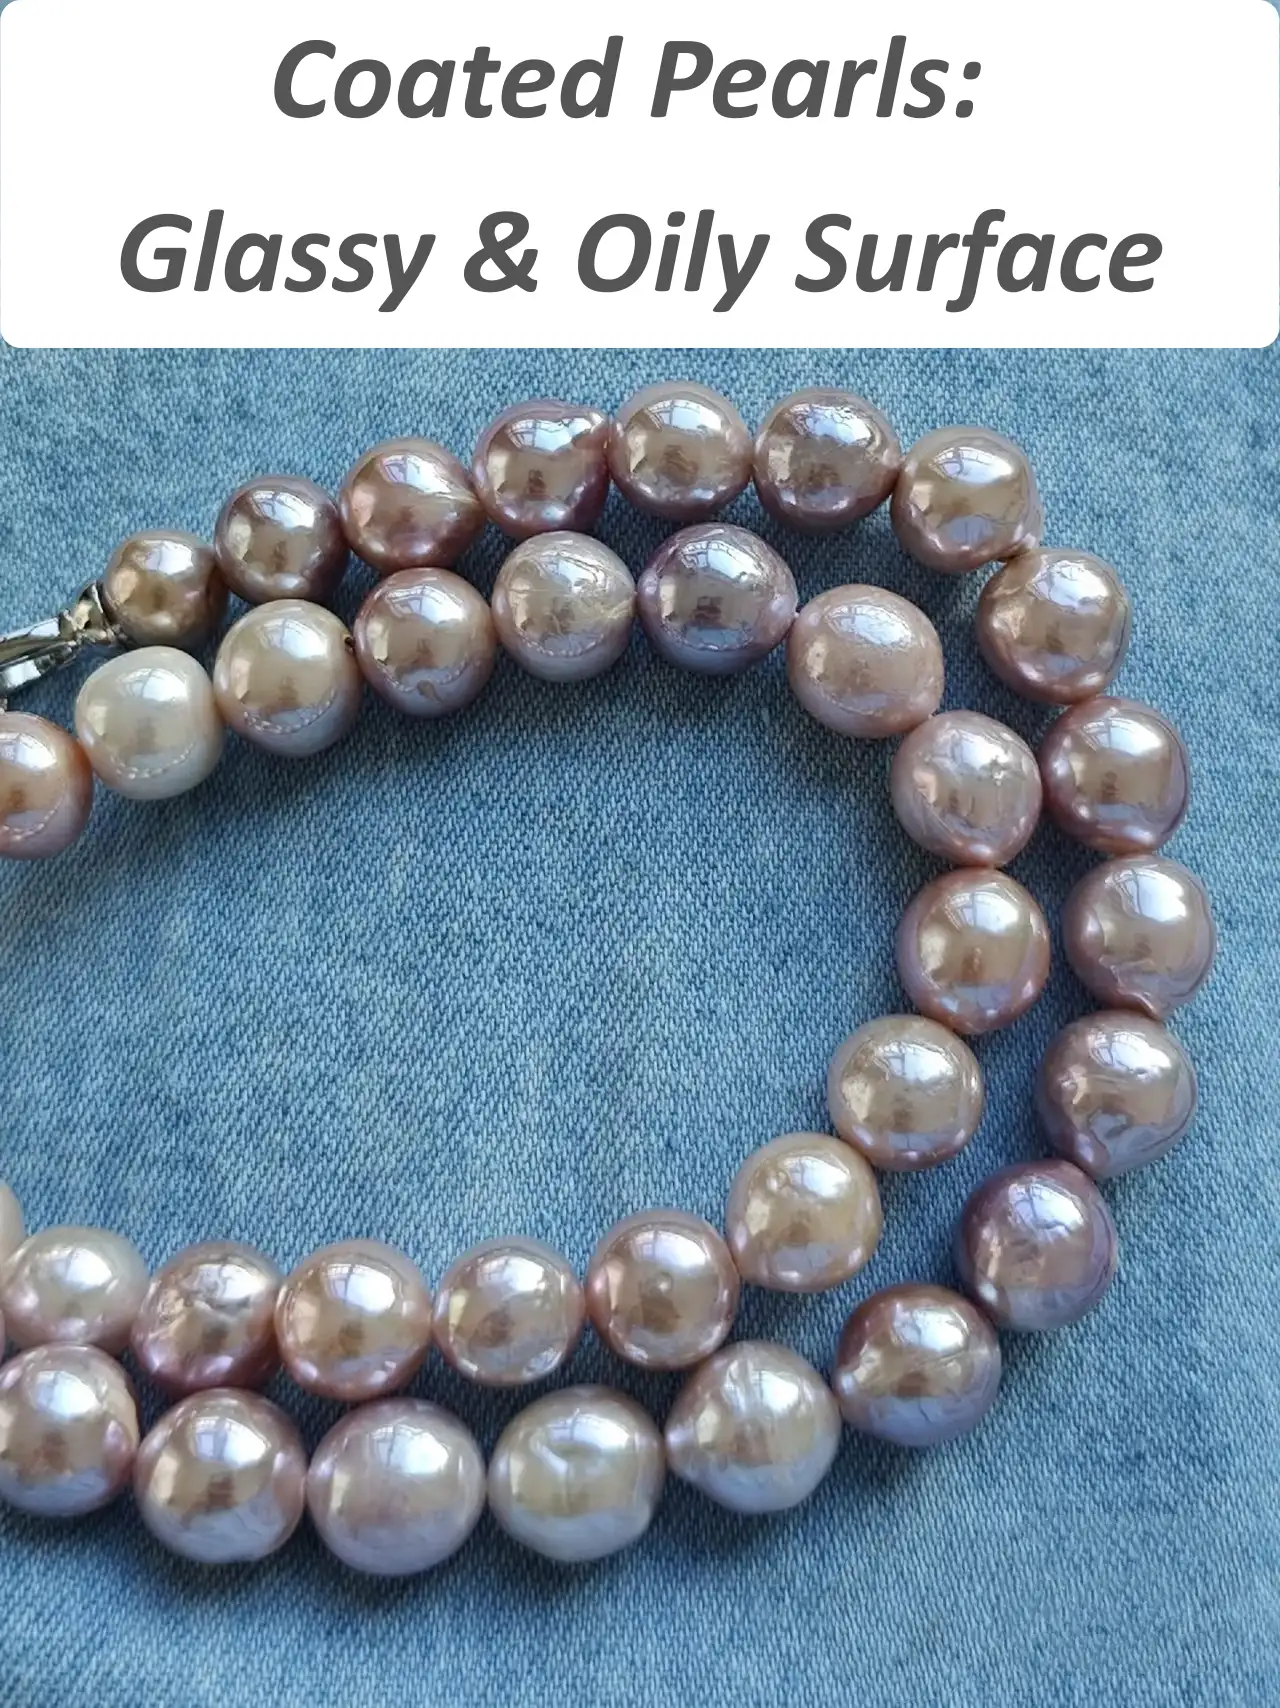
Sometimes pearls are strung together during the process. Using a loupe or magnifying glass to inspect the drill hole is crucial. You may notice a thin rim, peeling edges, or a break in the finish where the coating ends.
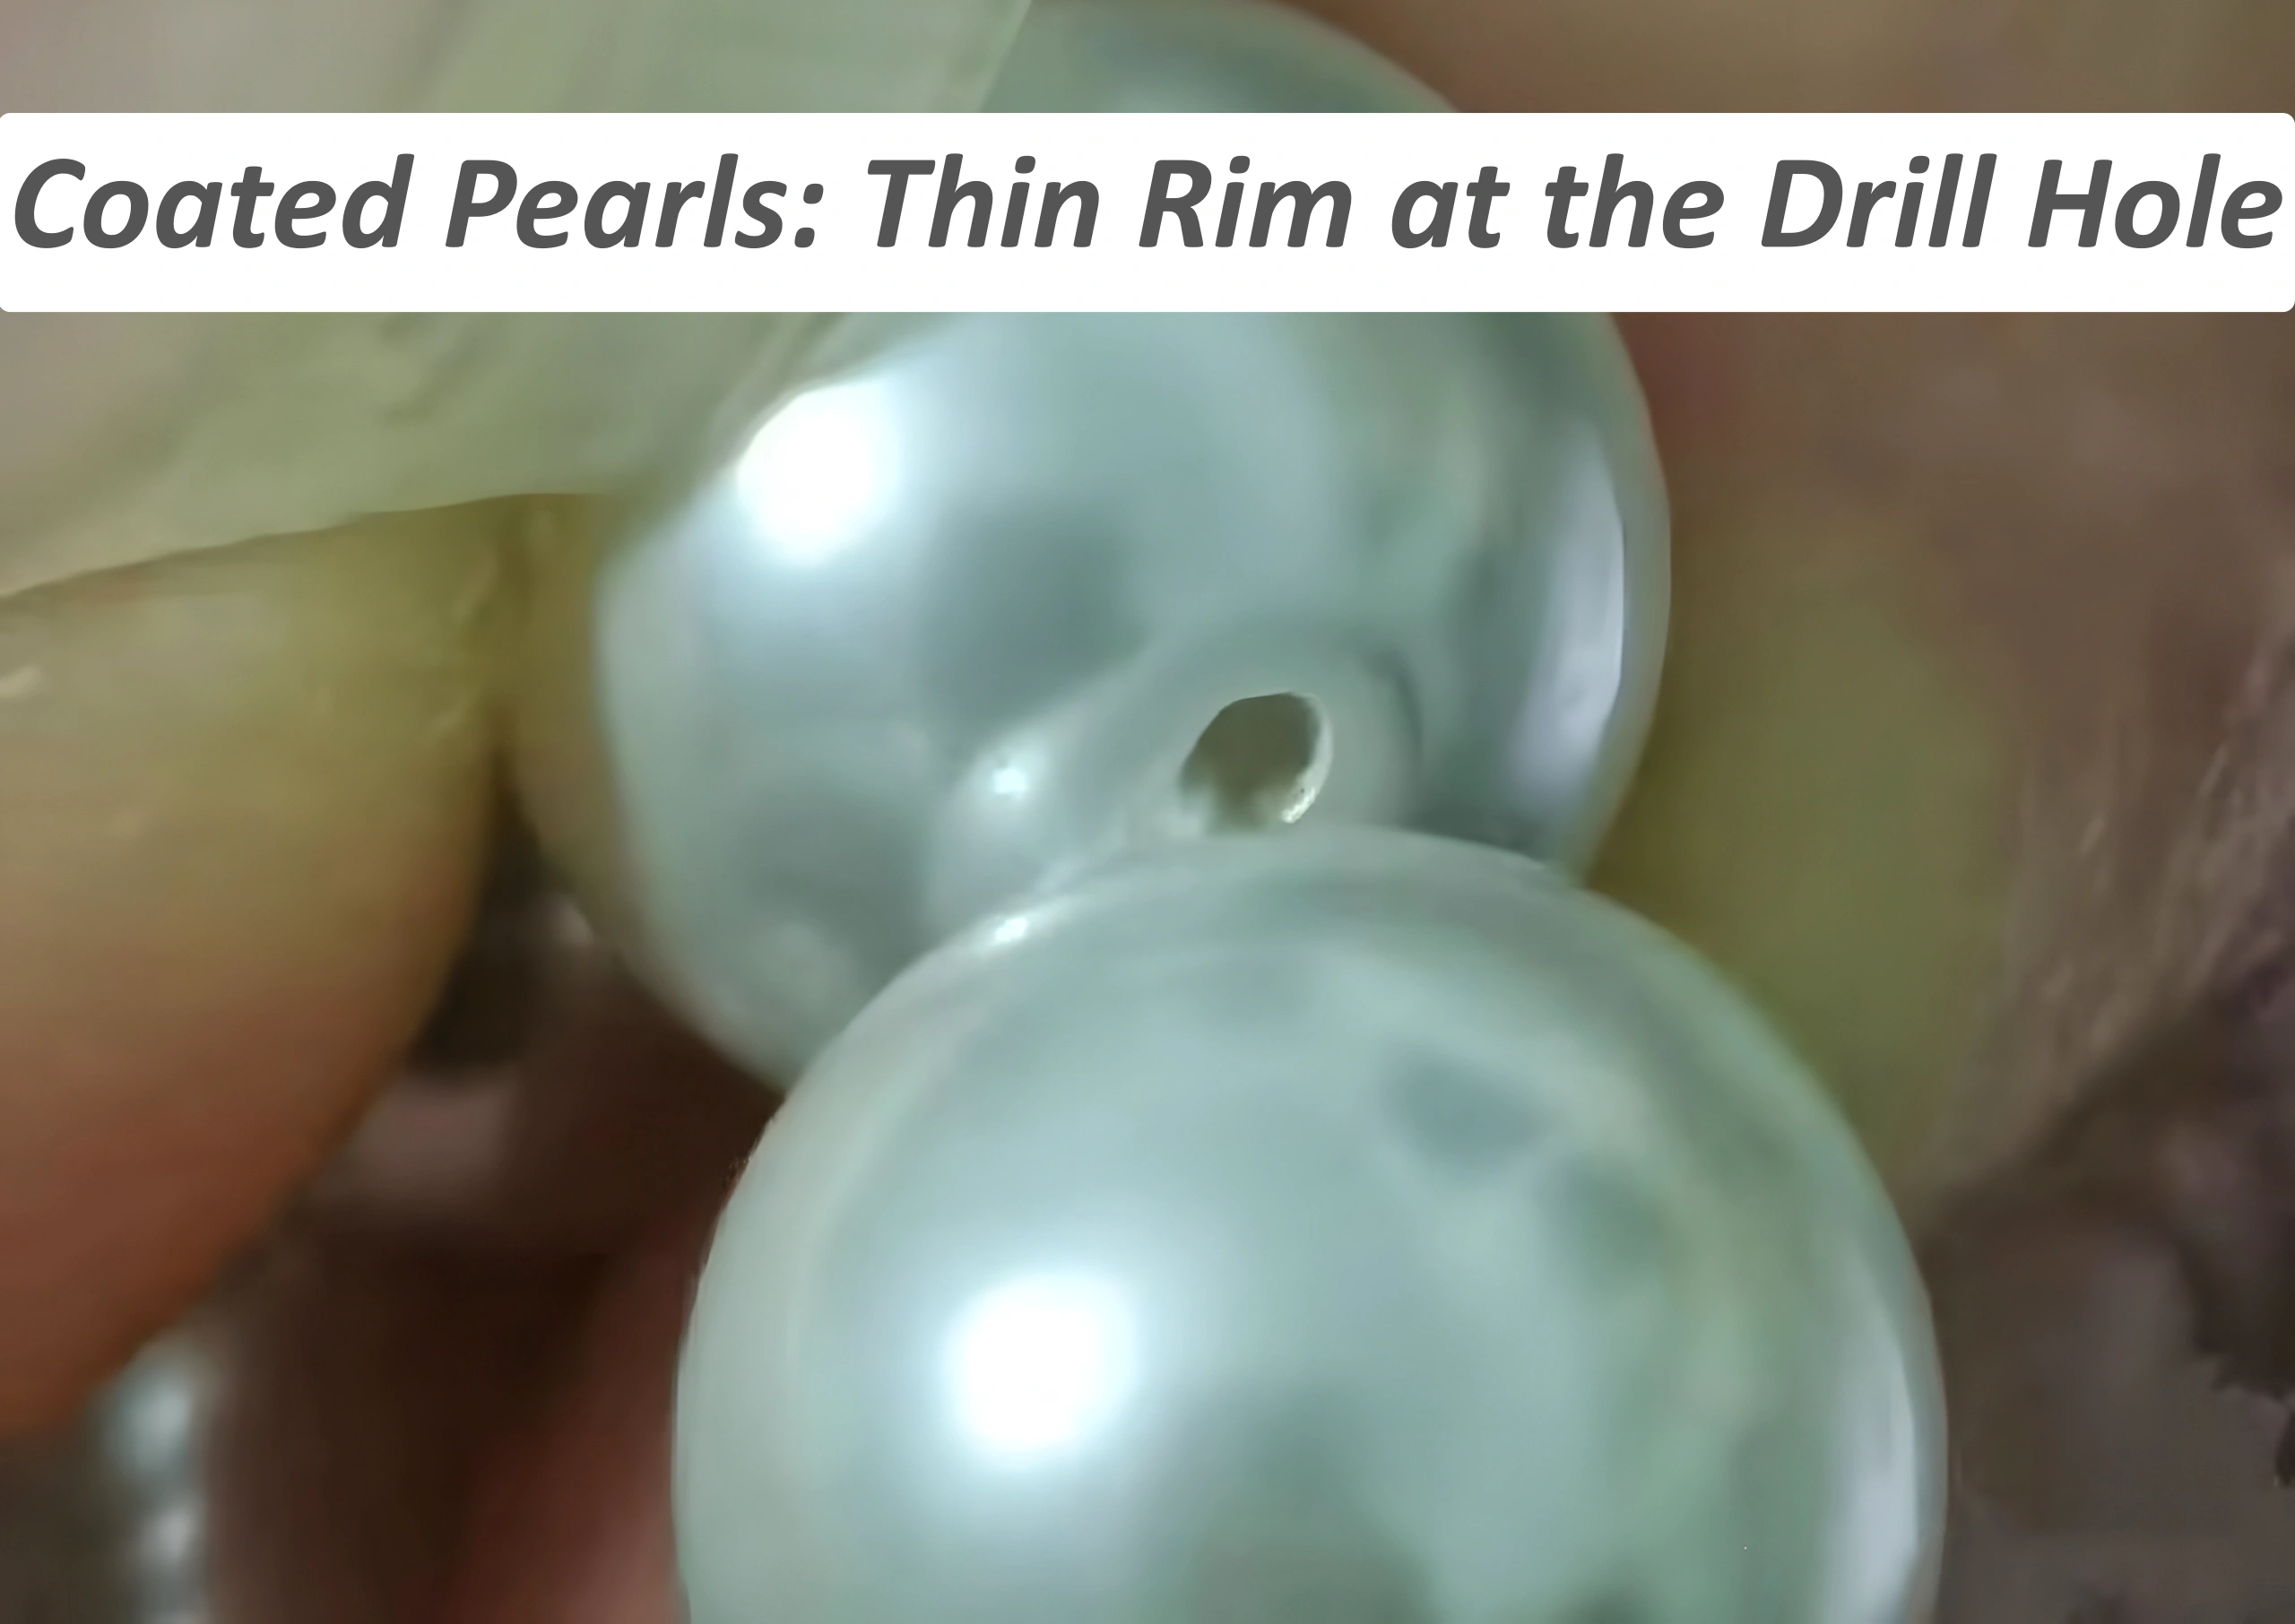
E.g. The picture above shows a magnified view of a pearl’s drill hole revealing the thin layer of the coating at the drill hole.
If the coating is thick enough, you might observe a strange phenomenon: you can clearly see the texture and blemishes of the pearl underneath, but when you touch it, the surface feels unnaturally smooth—like touching glass. Another “magical” sign is the spots on the pearl. Areas with low nacre coverage (white spots) are usually dull on a natural pearl, but on a coated pearl, these spots often shine brightly because they are covered by the “coat”.
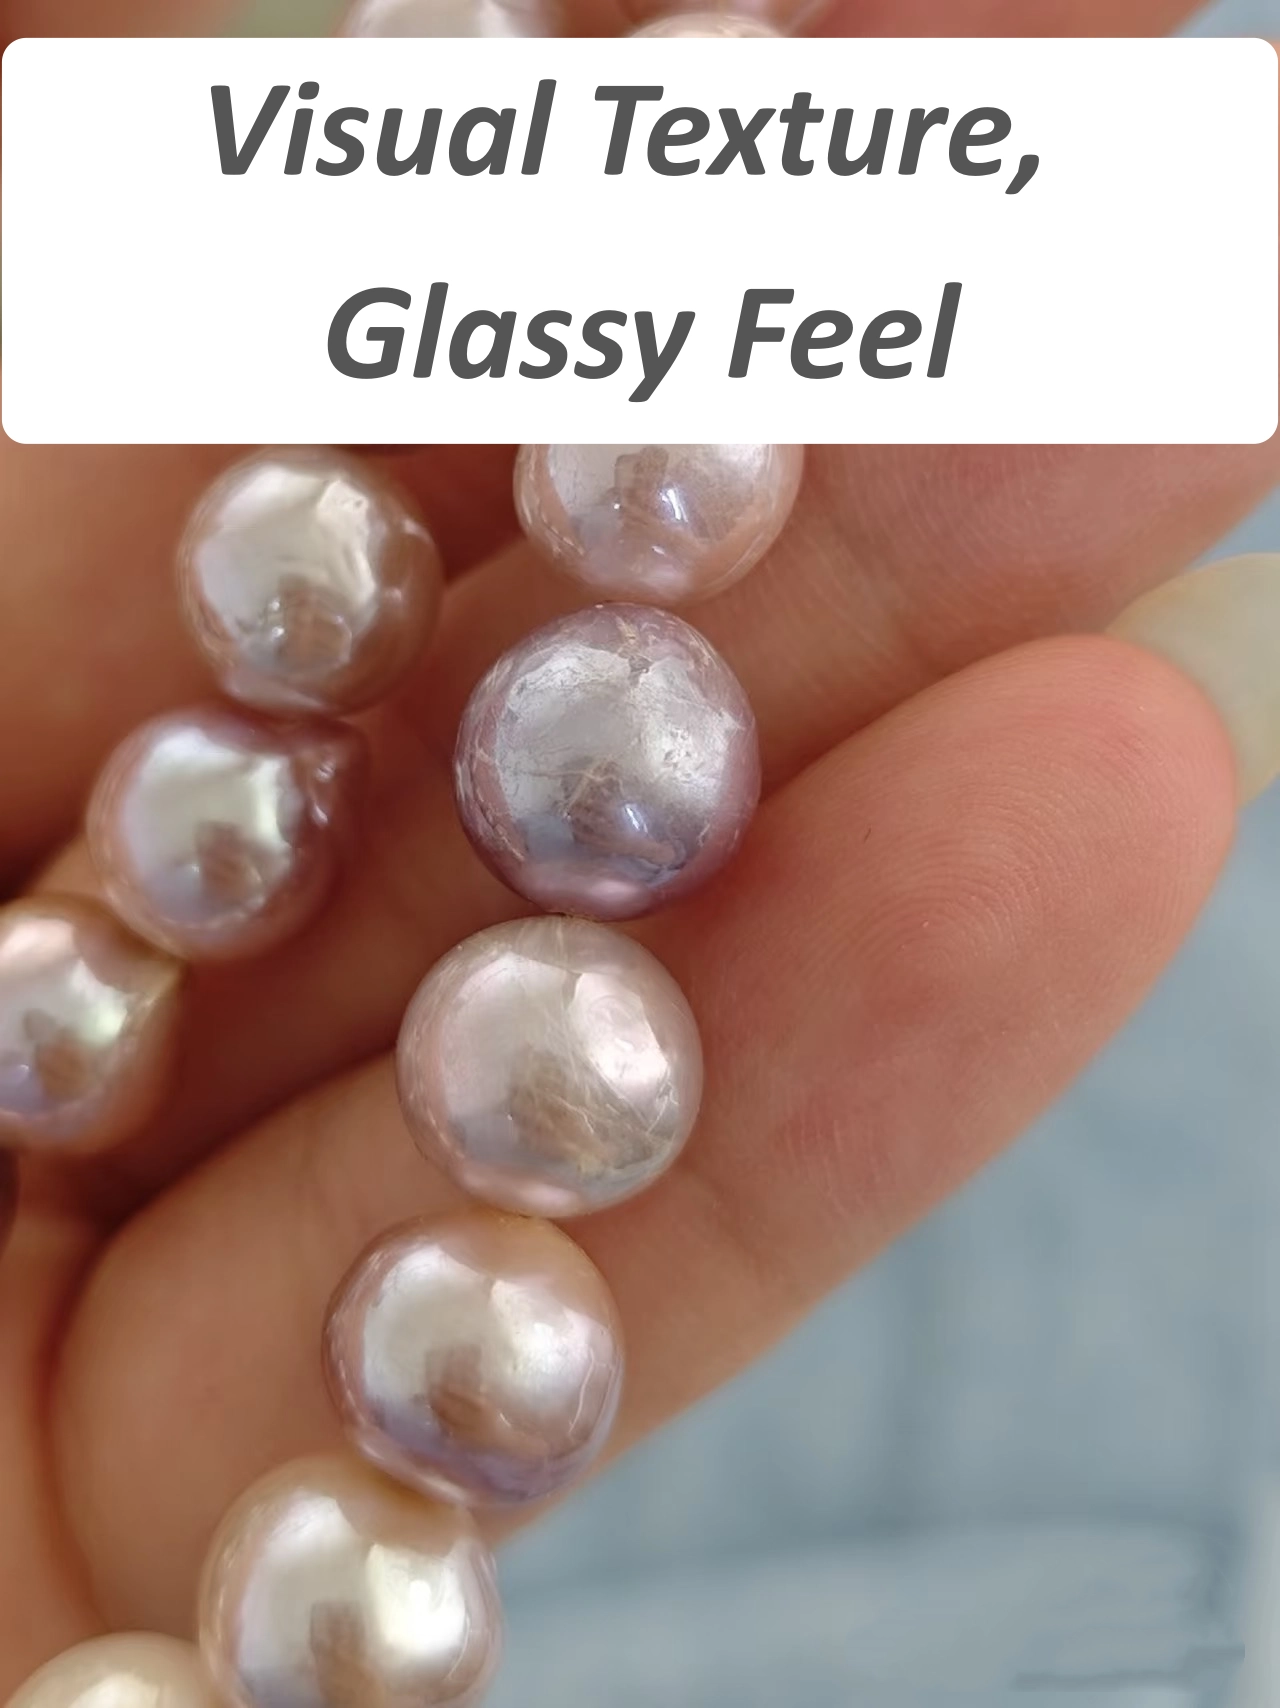
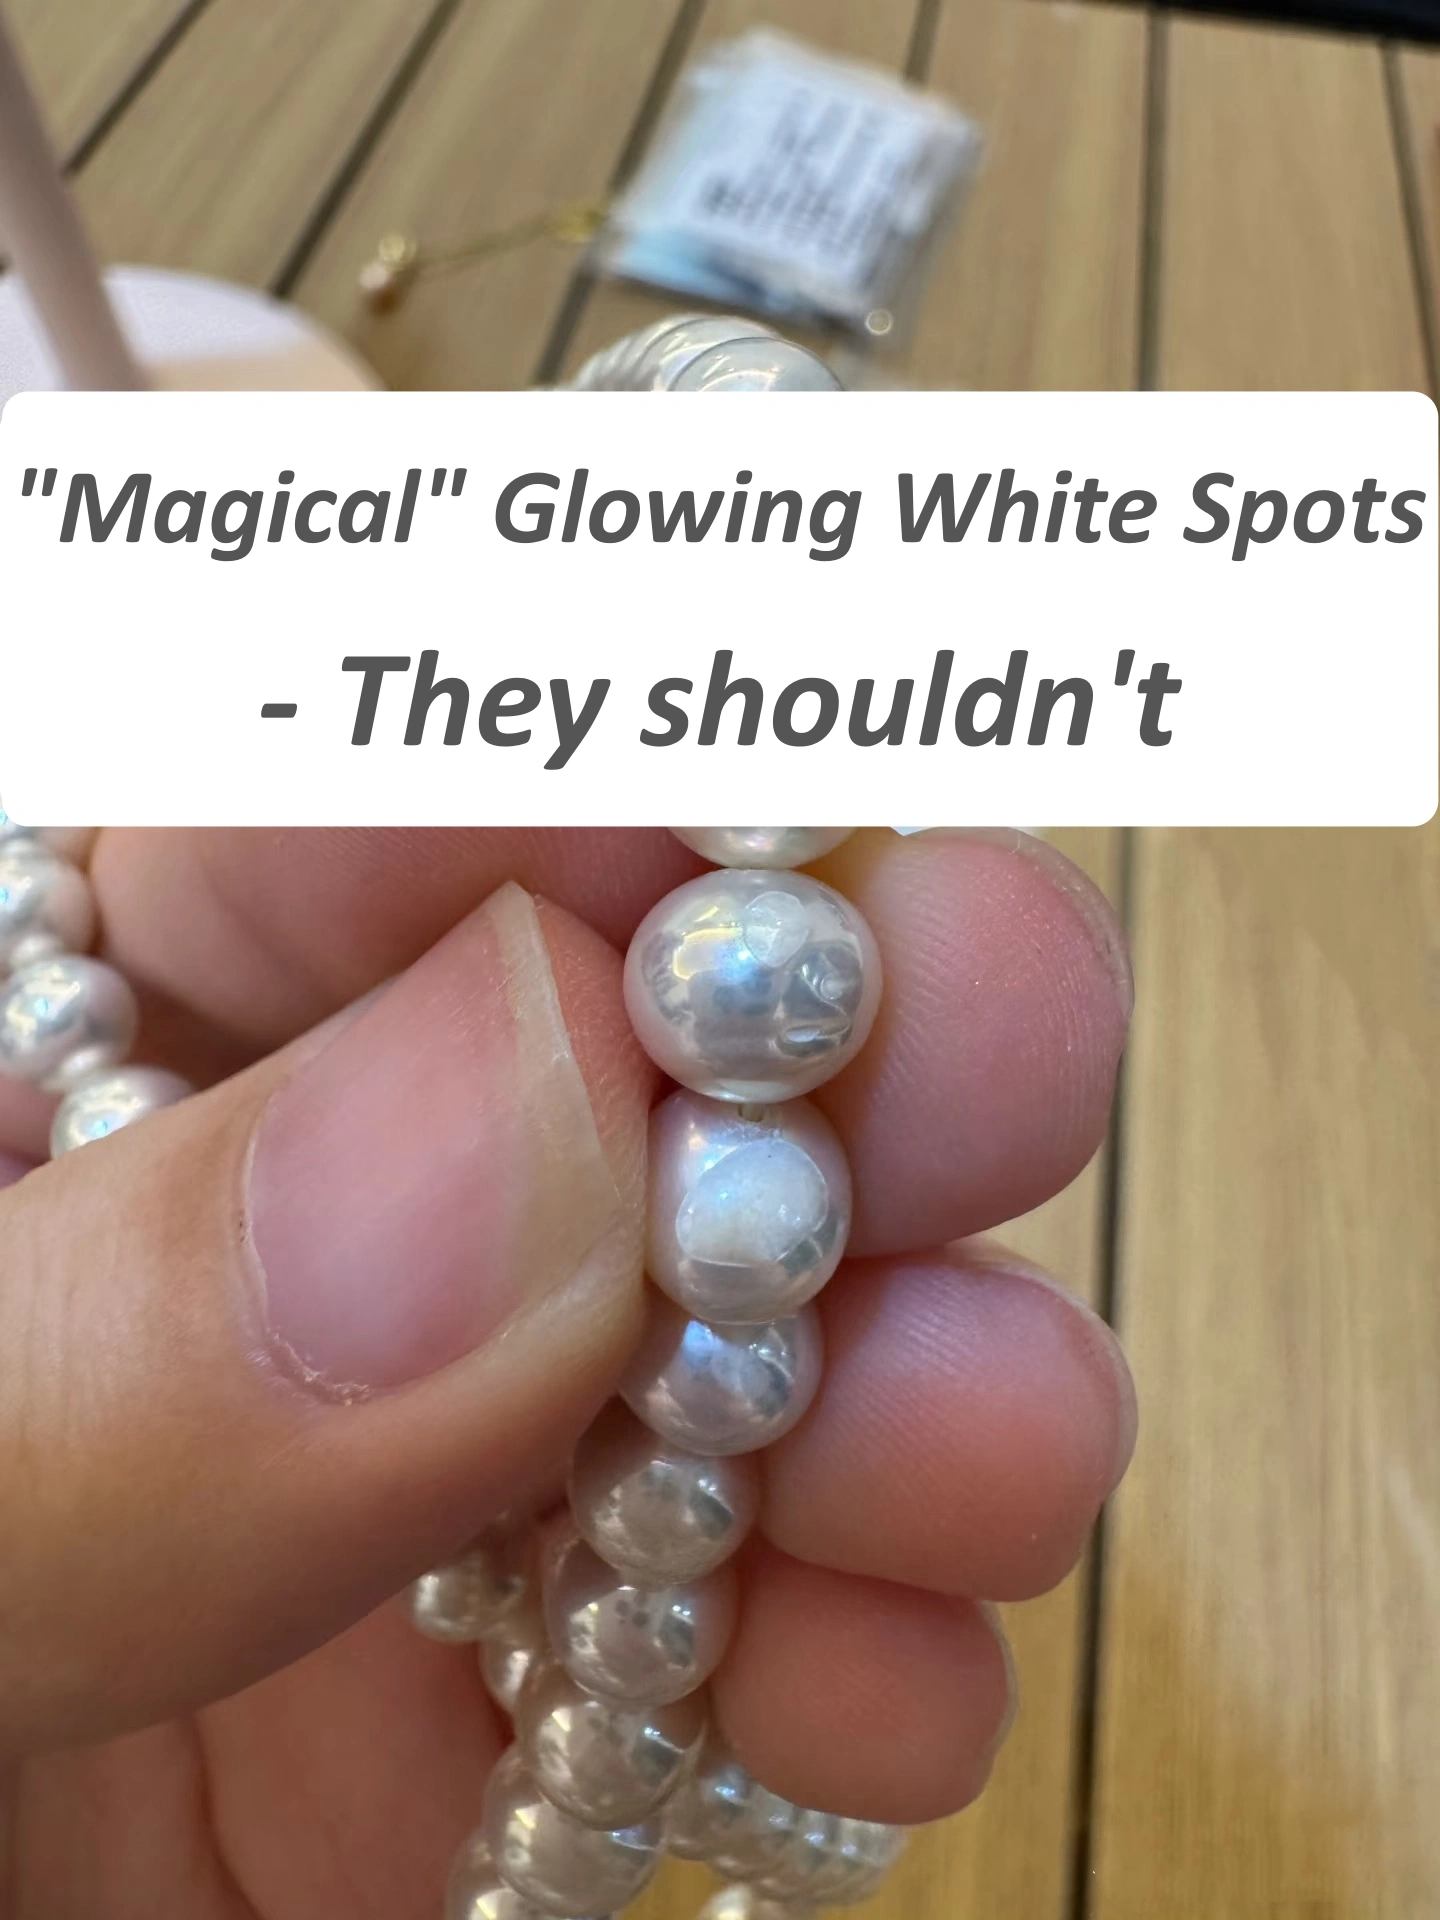
E.g. Even with visible natural flaws on the upper left pearl strand, the surface feels unnaturally smooth—like touching a pearl through glass. And notice in the upper right picture, how the white spots (usually matt) shine brightly under the coating. This “magic” is a red flag for treated pearls.
Wear Test Warning: If the coating is thin, rubbing two pearls together might feel slippery at first (no gritty friction). As the coating wears off, you might see metallic flakes or dust mixed with pearl powder. We do not recommend this test, as it can damage the pearls.
Part 2: Dyed + Coated Pearls
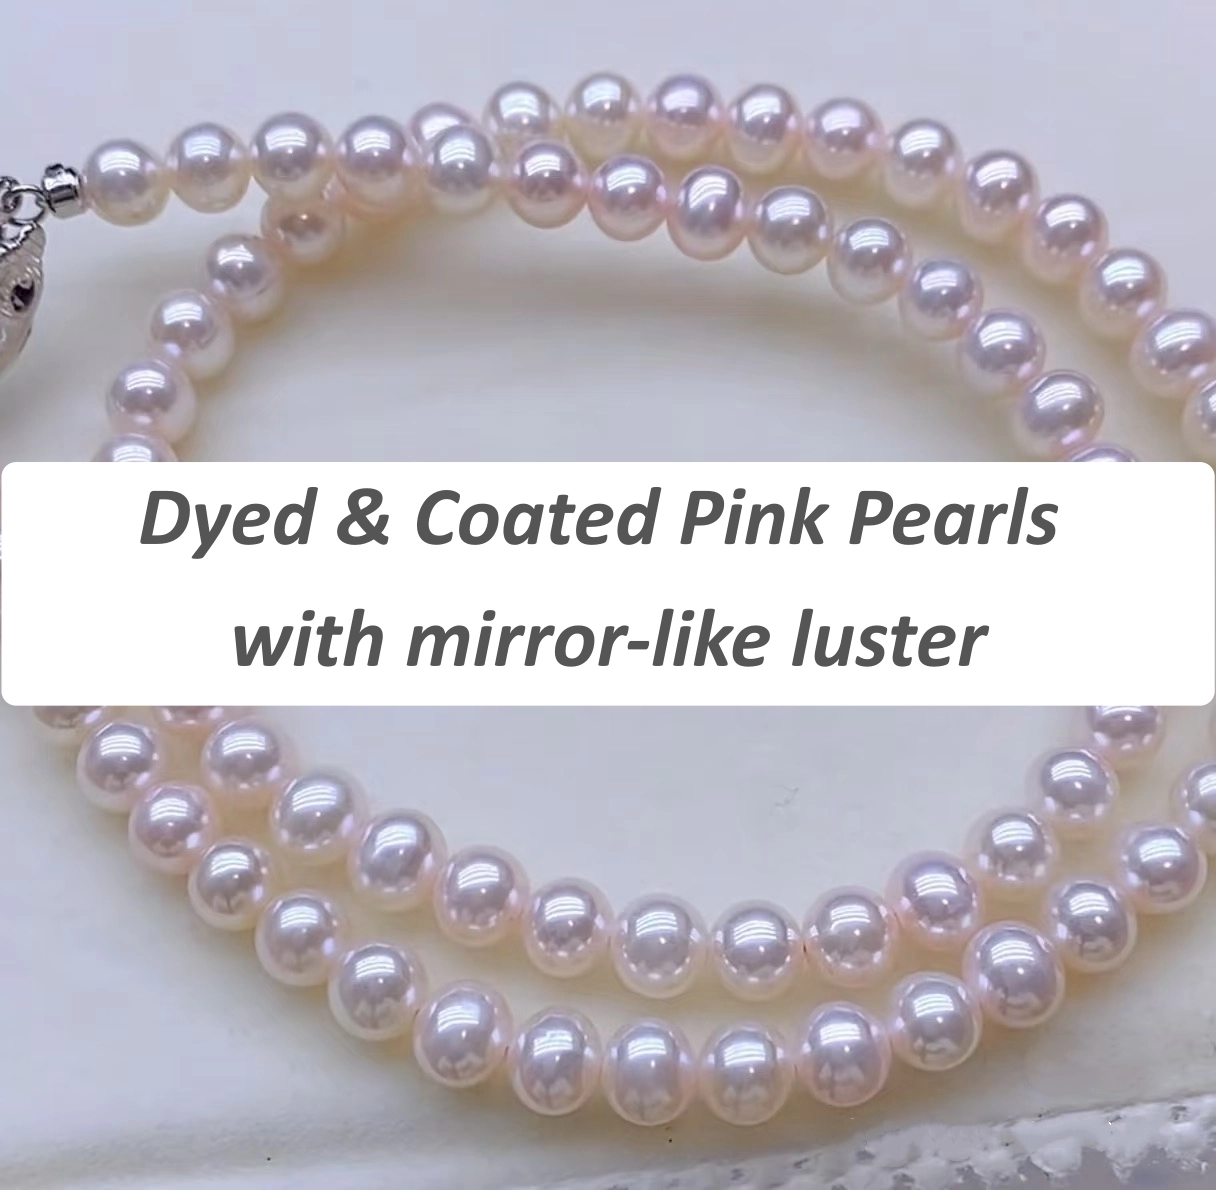
Modern pearl treatments often combine techniques. Many dyed pearls now utilize coating technology to compensate for the flat, lifeless appearance that dye alone can leave behind. By adding a thicker coating over the dye, the pearl gains a strong metallic mirror-like effect or an almost “oily” artificial brightness. Example as below.
Identification Tips
Even with a high-gloss coating, the underlying dye job remains detectable.
- Check for Orient and Overtones: Coating improves shine, but it cannot create the natural phenomenon of orient (the shimmering, iridescent rainbow effect) or natural overtones. If the pearl has a metallic mirror shine but zero depth or play of color, be suspicious.
- Inspect Flaws and Drill Holes: The dye is still present underneath the coat. Standard dyed pearls identification methods still apply. Look for concentrated pigment pools in the cracks, blemishes, or around the drill hole edges where the coating might be thinner. For picture references please see How to Identify Dyed Pearls.
Conclusion
Understanding coated pearls is essential for any buyer. While they can be beautiful, they require more careful handling and transparent disclosure than untreated gems. Always ask your seller about pearl color treatments to ensure you know exactly what you are buying.